

IHC Protocol - Paraffin Embedded Tissue
IHC Protocol - paraffin embedded tissues
Introduction to IHC-P
Put simply, immunohistochemistry (IHC) is a way of staining tissue samples to reveal if and where a specific protein is located in that sample. That one sentence makes it sounds somewhat easier than the reality. The reality is there are so many possible combinations of tissues types, ways to prepare tissues, species, antibodies and detection systems that many consider IHC as much art as science. But that’s OK, but because we’re here to help you, and once you’ve got a protocol optimizing for your application, they can be rock solid – working time after time. IHC-P refers to the staining of tissues that have been fixed (usually in neutral buffered formalin) and then embedded in paraffin before being sectioned.
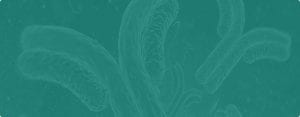
Image 1: A paraffin embedded tissue block
IHC-Fr is where the tissues are frozen and then sectioned – a subject we’ll tackle in a post in the near future. What follows below is a simple protocol for paraffin embedded section for you to build on, with some hints for things to look out for. You’ll likely need to optimize the protocol to fit with the reagents and tissue types you’re using, but this should help get you on the right track.Reagents for IHC-P:
- Your tissue sample dissected, clean and ready
- 4% paraformaldehyde
- PBS (room temperature and ice cold)
- Ethanol
- Dimethylbenzene
- Suitable paraffin
- Xylene
- Sodium Citrate Buffer (10mM Sodium Citrate, 0.05% Tween 20, pH 6.0)
- 1 mM EDTA, adjusted to pH 8.0
- Tris-EDTA Buffer (10mM Tris Base, 1mM EDTA Solution, 0.05% Tween 20, pH 9.0) [Antigen retrieval buffer]
- 5% BAS in PBS
The basic steps of the IHC-P protocol
- Step one: preparing your tissue
- Step two: dewaxing and rehydration
- Step three: antigen retrieval
- Step four: the staining
Step one: Preparing your tissue
This is one of the most important steps, as you want to ensure that you preserve the tissue correctly keeping the tissue structure, localisation of antigens and the physical nature of the antigens themselves so that your antibody can detect them – paraformaldehyde is used to help achieve this, fixing the tissue.- Place the tissue into some ice-cold PBS buffer.
- Cut into thin slices – about 3 mm should do
- Immerse in 4% paraformaldehyde at room temperature for 8 min
- Immerse in 4% paraformaldehyde at 4°C for about 6 hours
- Wash the tissue with PBS for about a minute
- Wash it two more times
- Dehydrate the tissue.
- 1 x in 80% Ethanol
- 1 x in 90% Ethanol
- 3 x in 95% Ethanol
- 3 x in 100% Ethanol
- 3 x in dimethylbenzene for 0.5 hours eat, at room temperature.
- Prepare a portion of liquid paraffin in a suitable bath, or similar, keeping it at about 58-60°C
- Immerse your tissue sample in the paraffin for 2 hours, repeat with a second portion of paraffin.
- Prepare a second portion of liquid paraffin in a suitable bath, or similar, keeping it at about 58-60°C
- Pour the paraffin into a mould and quickly transfer your tissue from the paraffin bath to the mold.
- Place paraffin embedded section on a microtome, or other slicer and take a few pieces of section to adjust the slicer so that the blade and section are parallel
- Carefully slice the rest of the section, aiming for about 5 µm thick.
- Incubate sliced sections in water at about 40-50°C to unfold them.
- Mount the tissue sections on suitable glass slides, such as poly-lysine or APES coated glass slides
- Incubate overnight at +37°C
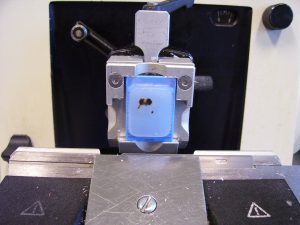
Image 2: A microtome
Step two: Dewaxing and rehydration
This step is important, as without it, it’s likely that your sections won’t stain properly or only very poorly. Place your slides in a rack and then wash as follows:- Xylene – twice for three minutes
- Xylene 1:1 with 100% ethanol – once for three minutes
- 100% ethanol – twice for three minutes
- 95% ethanol – three minutes
- 70 % ethanol – three minutes
- 50 % ethanol – three minutes
- Rinse with room water to rinse
Step three: Antigen retrieval
The tissue fixing step forms methylene bridges in the sample, cross linking proteins which can mask antigen binding sites. As such, antigen retrieval is needed to render antigens ‘visible’ to detection and allow immunohistochemical staining. There are two main methods for doing this, Heat induced Epitope Retrieval (HIER) and enzymatic, and multiple version of them. Use only one Some antibodies will specify the antigen retrieval method. If so follow such guides, otherwise, below are two example protocols:HIER
- Add the antigen retrieval buffer to the microwaveable vessel
- Remove the slides from the water and place them in the microwaveable vessel. Place the vessel inside the microwave.
- Boil for about 20 minutes
- After 20 minutes, carefully remove the vessel
- Run cold tap water into it for 10 minutes
Enzymatic retrieval
The exact process may depend on the enzyme you are using (e.g. pepsin, proteinase K, trypsin), therefore, follow the manufacturer’s instructions for preparation (including buffers) and use.- Set water bath to the optimal temperature for your enzyme
- Add purified water (ELGA, etc) to two containers that will accommodate your slide racks and place them into the water bath to warm.
- Place deparaffinized and rehydrated sections/slides in one water container to warm
- Prepare the enzymatic antigen retrieval buffer from the warm water in the other container, and then return to the water bath to allow the solution to re-heat
- Transfer warmed slides into the enzymatic buffer for 10 to 20 minutes with intermittent gentle agitation
- Remove slides and place in running tap water for three minutes to rinse off the enzyme
Step four: The staining
As always, if your antibody has an included protocol for IHC staining, follow that first. If not, the below is a guide to get you started, but you will likely have to optimise it for your antigen, species or tissue type.- Blocking
- Add 5% BSA in PBS to your antigen retrieved samples, ensuring you add enough to cover them
- Incubate for 30 min to 2 hours at +37°C, with gentle agitation
- Discard the excess – no need to wash
- Primary antibody incubation
- Dilute primary antibody to manufacturer’s instructions to suggested concentration
- Add to sample and incubate overnight at +4°C
- Rinse twice with PBS, 20 min each time with gentle agitation
- Secondary antibody incubation (biotinylated)
- Dilute secondary antibody to manufacturer’s instructions to suggested concentration
- Incubate for 1 hour at room temperature
- Rinse twice with PBS, 20 min each time with gentle agitation
- Staining – this will depend on your chosen detection method, we’re assuming strep-HRP. Again, follow manufacturer’s instructions if given
- Add the strep-HRP and incubate for 30 min at room temp
- Rinse twice with PBS, 20 min each time with gentle agitation
- Add detection reagent (e.g. DAM, TMB) incubate in the dark at room temp for 10 to 30 minutes.
- Rinse in running tap water for 5 minutes
- Counter stain (e.g. with haematoxylin) if needed
- Analyse via your chosen method
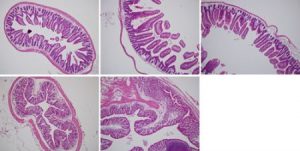
Image 3: Different magnifications of paraffinized intestinal tissue
We hope that this will give you a good place to start. As we said above, with so many steps and possible variation in reagents, IHC can be as much art as science. In the future we’ll be offering up more posts on trouble shooting IHC, to help you get the best result possible. Download PDF : Filed Under : IHC